The program MatchMaker helps in the design of radio-frequency
impedance matching networks.
To run MatchMaker you will need to install the Java Runtime Environment (JRE), version 1.5 or higher. If you are not interested in developing Java code, select the "JRE" for your computer and operating system. (The "SDK" is the system development kit, which is what you need if you want to write programs in Java.) This will install the Java Web Start program, which will launch the MatchMaker code.
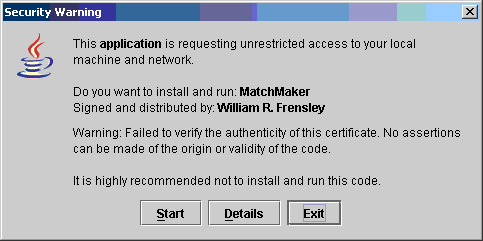
To run MatchMaker, click on the link below. The first time you run MatchMaker, Java Web Start will give you a security warning as shown below:
What this means is that I have not paid a few hundred dollars per year for a verified security certificate. Note that the code is being served from the University of Texas at Dallas web site, and that I am a Professor at UT-Dallas and make your own judgement about the safety of this code.
When MatchMaker launches, you will see a screen like the following figure:
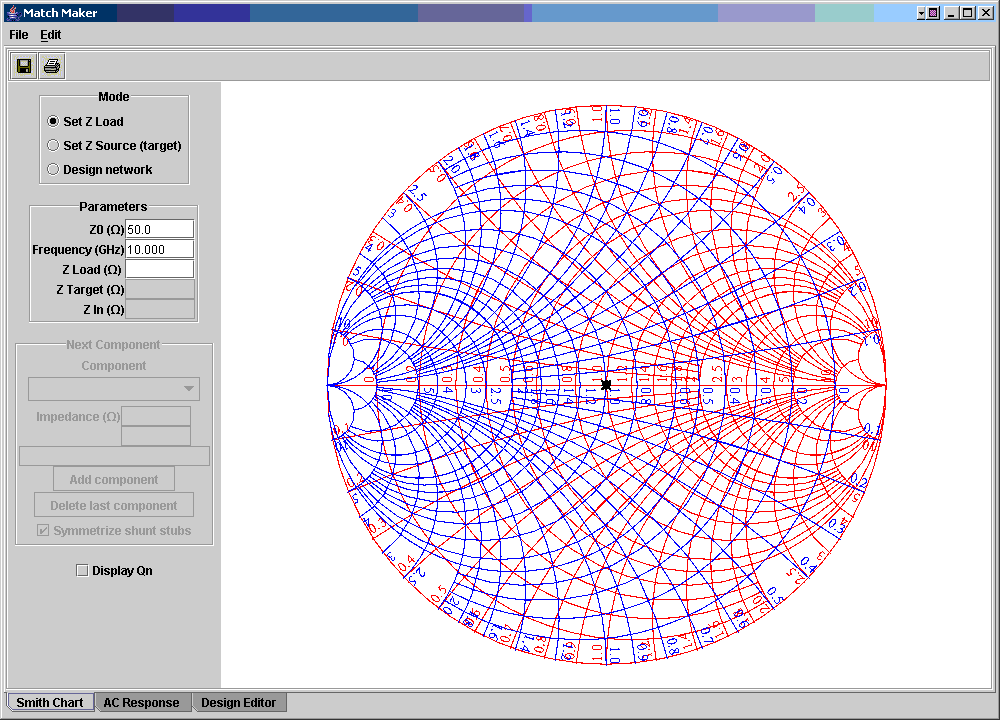
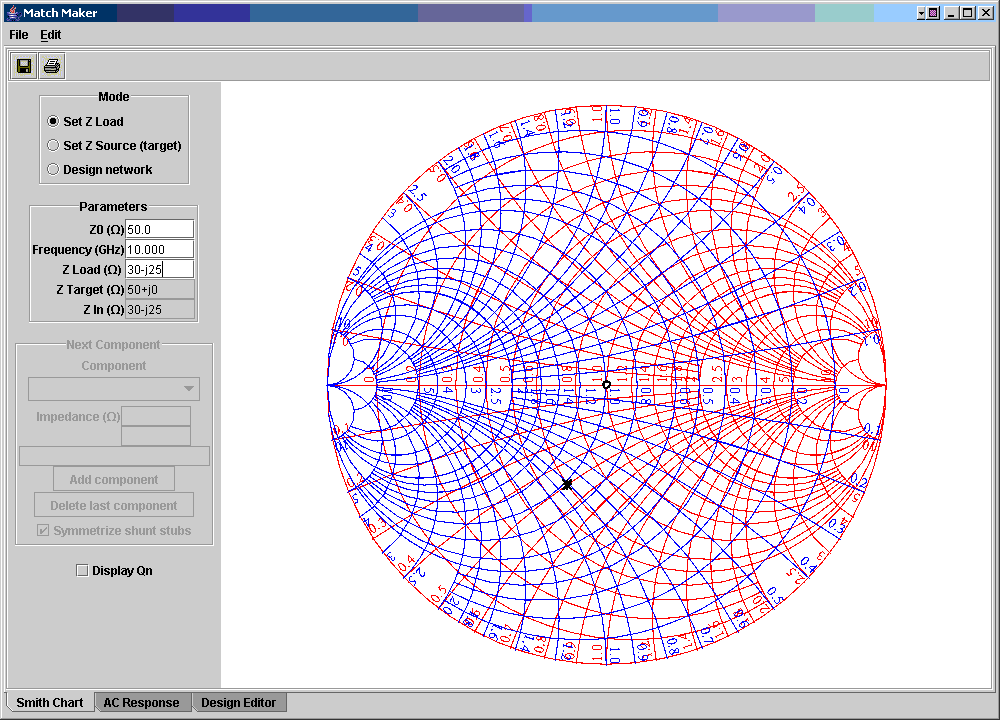
The top widget in the left-hand panel selects the mode of operation. "Set Z Load" lets you set the load impedance you wish to match. This can either be done by direclty dragging the marker around the Smith chart with the mouse, or by entering a number in the Z Load text box (then press Enter). Suppose we want to match to a load impedance of 30-j25 Ohms. Dragging or entering text, we get:
Suppose we want to match this load to a 50 Ohm source. We would now select "Design Network" in the Mode box, and we will see that the "Next Component" box is now activated. Click on the "Component" drop-down box, and select "Series inductor." You should now see a display like this:
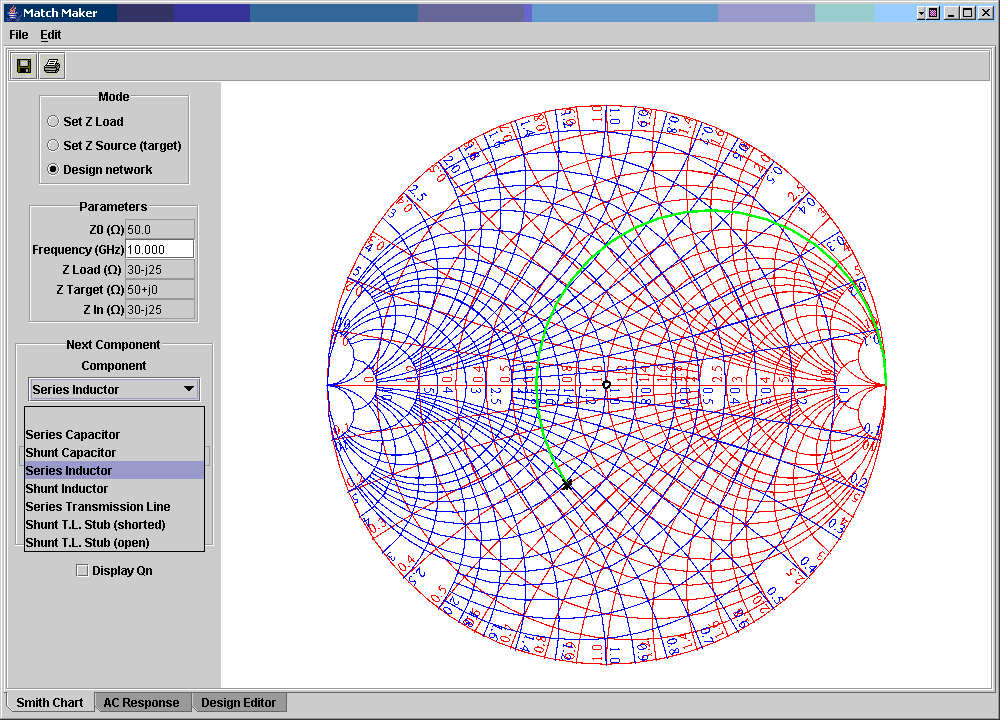
The green line shows the points on the Smith chart that we can get to by inserting a series inductor. To select the magnitude of the inductor, decide where you want to go on the chart, and click on the green line at the desired point. In this case, it should be where this line intersects the g=1 conductance circle. Doing so will move the black "X" to that point, and in this case MatchMaker will tell us that Zin will now be 30+j25 Ohms, the change in normalized reactance equals 1.0, and the inductor's value will be 0.8 nH. (These values may differ a bit if you don't hit exactly the right pixel.) Now, we push the "Add component" button, and the green line is replaced by a black line drawn to the chosen point.
Now, select "Shunt Capacitor" as the next component. Again, the green circle shows which impedances can be reached with this component. Click as close as possible to the center of the Smith chart, and we find that the capacitor will have a value of 0.26 pF, as shown in this figure:
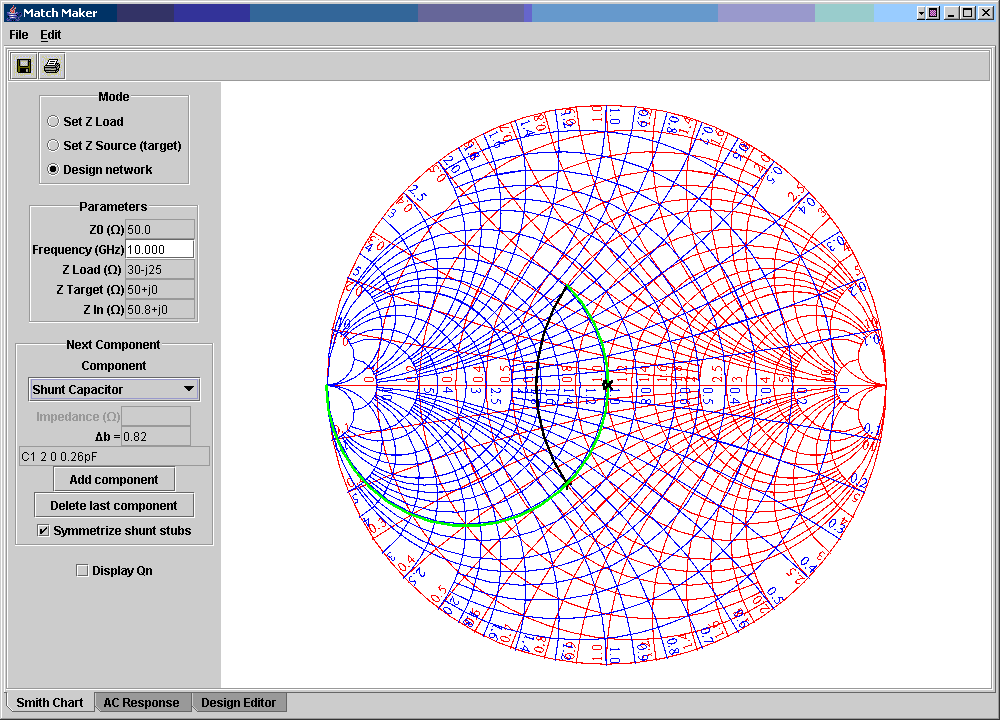
(We also see that, since the green arc passes through both 50 Ohms
and
Z Load, we could have achieved a single-component match in this case
with
a shunt inductor, but the series-inductor shunt-capacitor combination
is
generally more flexible.) The value of Z In is not quite exactly
50 Ohms. In fact it is 50.8 Ohms, but this is the sort of
precision
that one may expect with a
graphical tool like the Smith chart. Accepting this component,
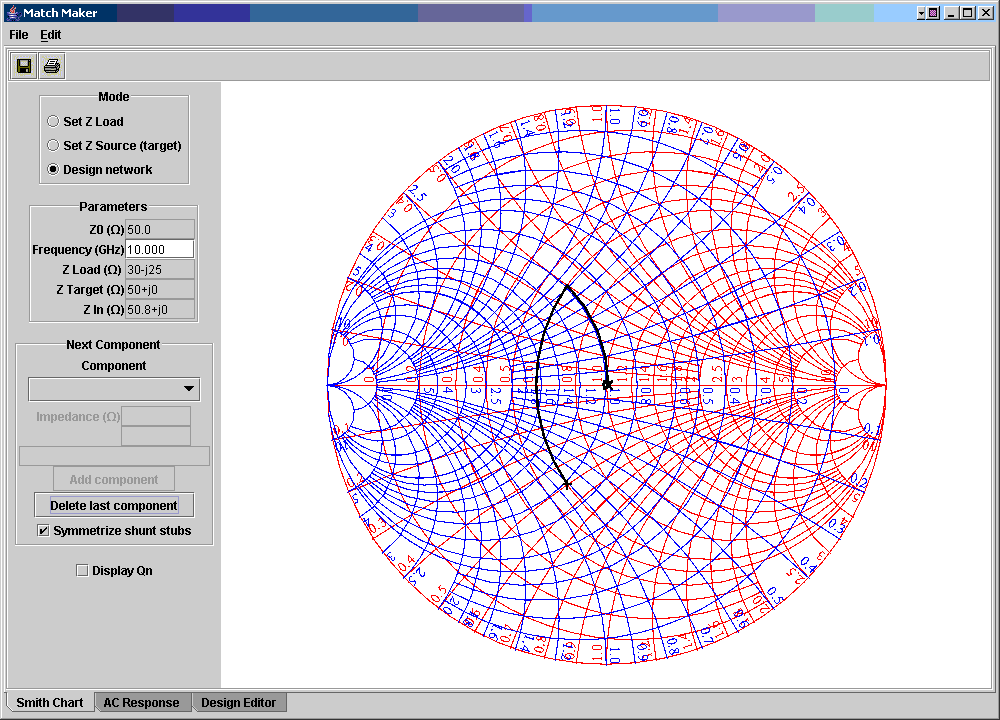
we finally get the graphical representation of the matching network:
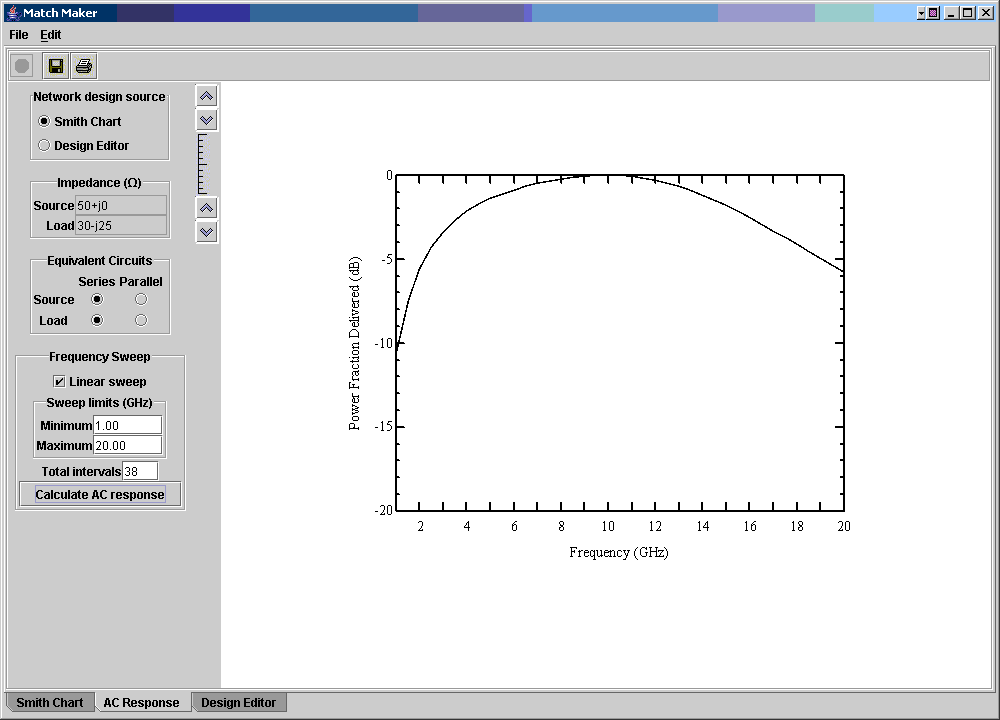
If we now click on the "AC Response" tab at the bottom of the MatchMaker frame, we will be able to plot the frequency response of the matching network we have designed. We have to make some sort of simple assumption about the frequency response of the source and load networks. These assumptions are that those networks are either simple series or parallel combinations of a resistive and a reactive element. One sets this assumption by clicking the radio buttons in the "Equivalent Circuits" box. After pushing the "Calculate AC Response" button the AC Response display looks like this:
If you then click on the "Design Editor" tab, you will see a description of the matching circuit in SPICE *.cir file (nodelist) format:
L1 2 1 0.8nH
C1 2 0 0.26pF