UT Dallas Computer Science Outreach
LOGO Workshop contents
A Program is a set of instructions to the computer to do a specific
task
LOGO is the graphical programming
language to move a ‘turtle’ over the surface

Turtle
Basics
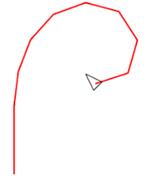
The little triangle in the
middle of the screen is called ‘turtle’.
![]() Moving the Turtle:
FD 100
Moving the Turtle:
FD 100
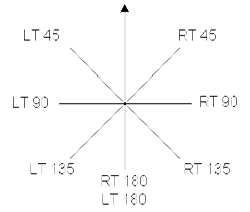
Turning the Turtle:
Getting Started!
We
use the web based Logo Interpreter from http://www.calormen.com/logo/
The
website stores your session history and saves your procedures to be re-used.
Command
box in the bottom of the page looks like this:

You
can issue the following commands and see them in action!
Basic Logo Commands:
|
Command |
What it does |
|
FD 100 |
Move the turtle forward 100 steps. |
|
RT 90 |
Turn the turtle to the right 90º. |
|
LT 90 |
Turn the turtle to the left 90º. |
|
BK 100 |
Move the turtle backwards 100 steps. |
|
PU |
Put the turtle's pen up off the paper. |
|
PD |
Put the turtle pen back down on the paper. |
|
CS |
Clear the screen and start over. |
|
HT |
Hide the turtle (triangle). |
|
ST |
Show the turtle (triangle). |
|
REPEAT 3 [...] |
Repeat the commands 3 times. |
|
HOME |
Resets the turtle to centre of the screen |
|
SETXY 20 20 |
Sets position of turtle to new values of X and Y |
|
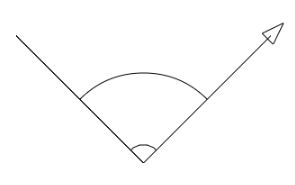
ARC 90 50 |
Creates arc enclosed in angle 90 with radius 50 |
1.
Simple Drawings:
Issue the following commands and see the
output. Try to understand why each command draws corresponding outputs.
|
Command |
Output |
|
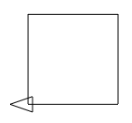
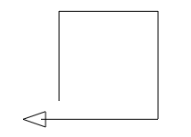
cs fd 100 rt 90 fd 100 rt 90 fd 100 rt 90 fd 100 |
|
|
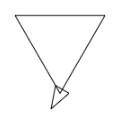
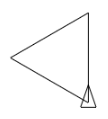
cs fd 100 rt 120 fd 100 rt 120 fd 100 |
|
|
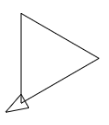
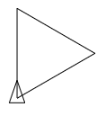
cs rt 90 fd 100 rt 120 fd 100 rt 120 fd 100 |
|
|
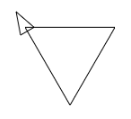
cs lt 30 fd 100 rt 120 fd 100 rt 120 fd 100 |
|
|
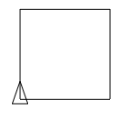
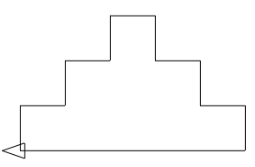
cs fd 100 rt 90 fd 110 rt 90 fd 120 rt 90 fd 130 |
|
You
can click ON the arrow at the top right corner (as shown below):

Now,
you are in Command mode - you can type several commands in the window, but the
program will run only when you click on Run button. Program continues to stay
there – makes it easy to edit, update and run again. Try the commands for
Simple drawings again:

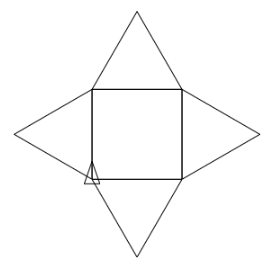
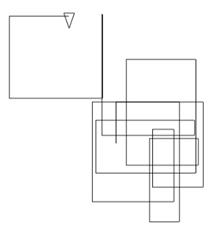
2. Power of Repeat:
Drawing Polygons and Stars
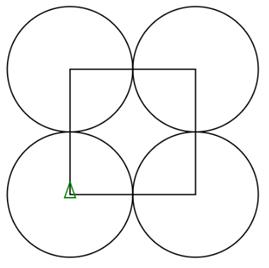
Use
cs command to clear the screen whenever you want to start
with a blank workspace.
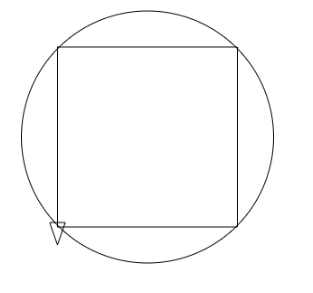
|
REPEAT 3 [FD 100
RT 120] |
|
|
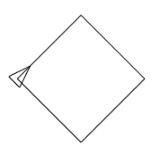
REPEAT 4 [FD 100
RT 90] |
|
|
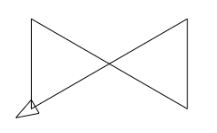
REPEAT 4 [ FD 100 LT 120 FD 100 LT 120 FD 100 LT 120 FD 100 RT 90 ] |
|
|
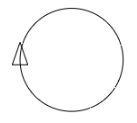
REPEAT 360 [FD 1
RT 1] |
|
|
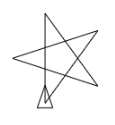
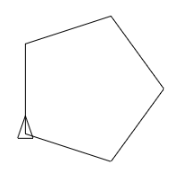
REPEAT 5 [FD 100
RT 144] |
|
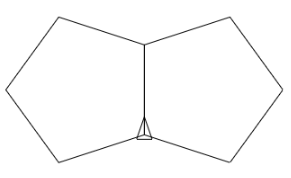
3. Try to draw these on your own! End position of turtle can be anywhere & need not match with these drawings.Hints: you may need pu and pd commands to draw disconnected components. Also, you may also need repeat within repeat to draw complex stuff. A |
B |
C |
D |
E |
F |
G |
H |
I |
J |
K |
L |
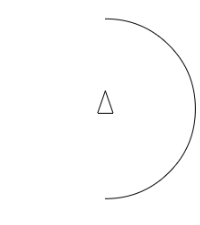
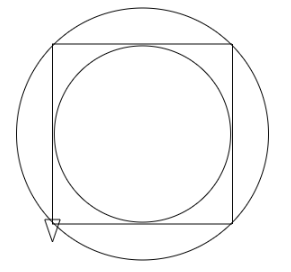
Feel free to be creative and develop a few cool shapes on your own! 4. arc function to draw circle OR part of a circle. Note: Turtle does not move. cs arc 360 100 |
|
cs arc 180 100 |
|
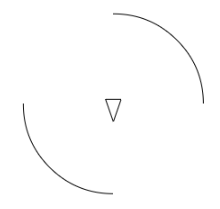
cs arc 90 100 rt 180 arc 90 100 |
|
cs arc 90 100 rt 180 arc 90 100 |
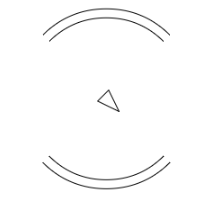
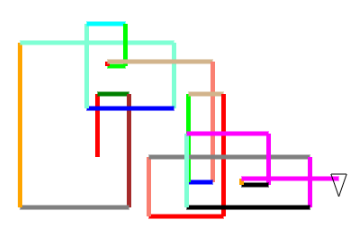
5. Try to draw these on your own! |
|
|
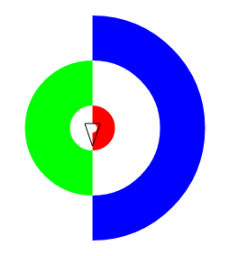
6. set pen size and fill color cs setpensize 50 arc 180 100 rt 180 arc 180 50 |
|
cs setpensize 20 arc 180 15 setpensize 50 arc 180 100 rt 180 arc 180 50 |
|
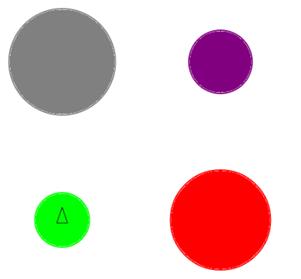
cs setpensize 20 setpencolor 4 arc 180 15 setpencolor 1 setpensize 50 arc 180 100 rt 180 setpencolor 2 arc 180 50 |
|
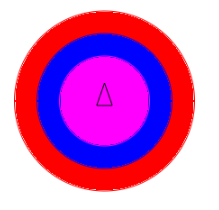
cs setpencolor 4 arc 360 100fillsetpencolor 1 arc 360 75fillsetpencolor 5 arc 360 50fill |
|
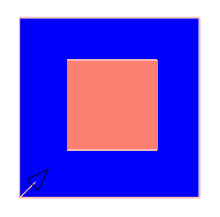
CS SETPENCOLOR 12REPEAT 4 [FD 100 RT 90] PURT 45FD 25FILLBACK 100PDLT 45REPEAT 4 [FD 200 RT 90] RT 45FD 25SETPENCOLOR 1FILL |


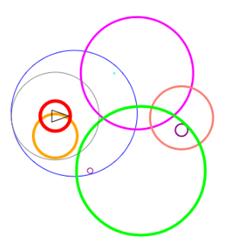
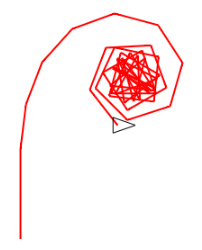
7. Let your creativity run wild and try a few colored picures of your own! 8. random function cs repeat 30 [fd random 200 rt 90] |
|
cs setpensize 5 repeat 30 [setcolor random 16 fd random 200 rt 90] |
|
cs repeat 10 [ setcolor random 16 setpensize random 8 pu fd random 100 pd arc 360 random 100 rt 45] |
|
cs repeat 10 [ setcolor random 16 setpensize random 8 rt random 360 arc 180 random 200] |
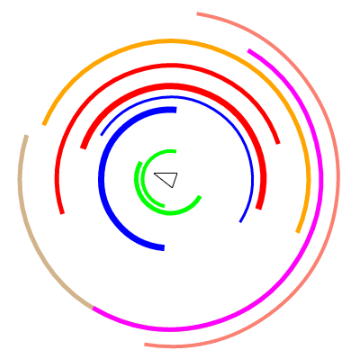
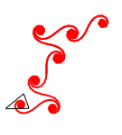
9. Logo Variables print :variablecan be used to print the values on screen. cs setpensize 2 make "angle 0repeat 10 [fd 50 rt :angle make "angle :angle + 7] |
|
cs setpensize 2 make "angle 0repeat 45 [fd 50 rt :angle make "angle :angle + 7] |
|
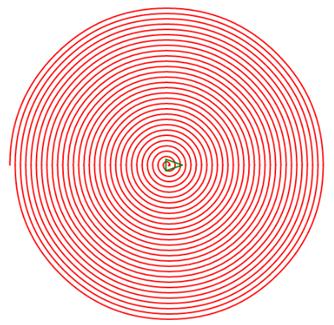
cs setpensize 2 make "angle 0repeat 500 [fd 5 rt :angle make "angle :angle + 7] |
|
cs pu setpensize 2 setxy -200 -100 repeat 4 [ pu fd 250 setcolor random 16 pd arc 360 random 150 fill rt 90 ] |
|
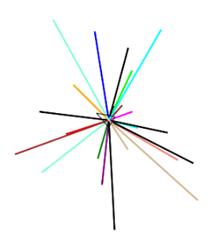
cs make "angle 0repeat 25 [setpencolor random 16 fd :angle back :angle rt :angle make "angle :angle + 7] |
|
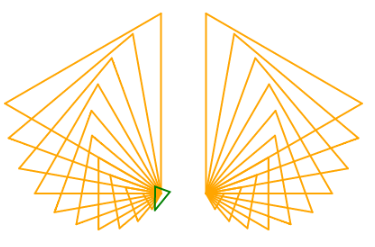
cs repeat 20 [ setcolor random 16 setpensize random 5 make "side random 200 repeat 4 [fd :side rt 90] rt random 360] |
|
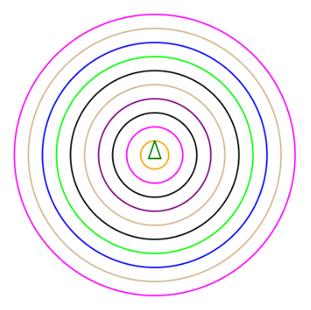
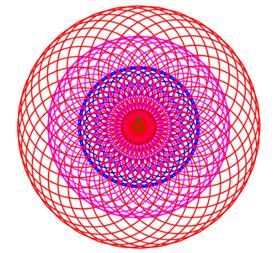
cs make "size 250setpensize 1 repeat 10 [ setpencolor random 16 arc 360 :size make "size :size - 20 fill] |
|
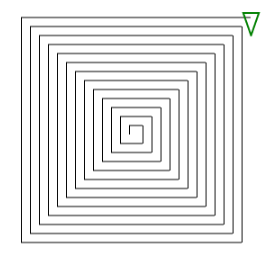
cs make "size 10repeat 50 [ fd :size rt 90 make "size :size + 5] |
|
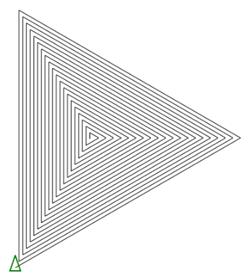
cs make "size 10repeat 60 [ fd :size rt 120 make "size :size + 7] |
|
cs rt 90 setpensize 2 setpencolor random 16 make "size 1repeat 60 [ arc 180 :size pu bk 4 pd rt 180 make "size :size + 4] |
|
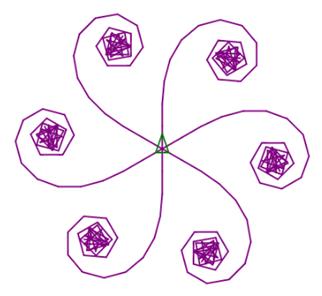
cs setpensize 2 setpencolor random 16 make "turn 0while :turn < 360 [ make "angle 0 while :angle < 180 [ fd 30 rt :angle make "angle :angle + 5 ] pu home pd make "turn :turn + 60 rt :turn] |
|
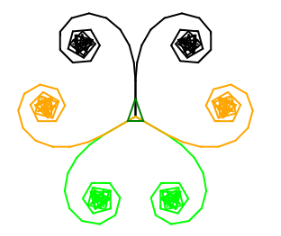
cs setpensize 2 make "turn 0while :turn < 360 [ setpencolor random 16 make "angle 0 while :angle < 180 [ fd 20 rt :angle make "angle :angle + 5 ] pu home pd lt :turn make "angle 0 while :angle < 180 [ fd 20 lt :angle make "angle :angle + 5 ] pu home pd make "turn :turn + 120 rt :turn] |

10. Create your own artistic creations using the power of Variables!
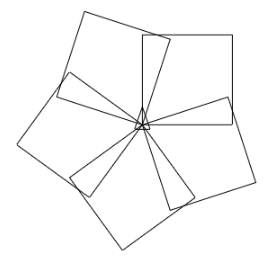
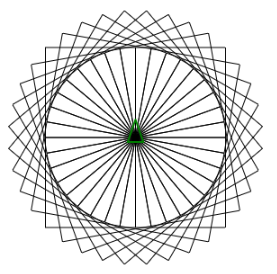
11. Our own Procedures - We can write our own procedures in Logo, then use them like in-built functions! |
TO SQUARE REPEAT 20 [SQUARE RT 20] |
|
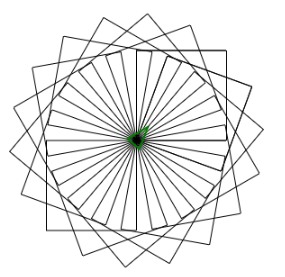
to square :size repeat 4 [fd :size rt 90]endcs repeat 36 [square 100 rt 10] |
|
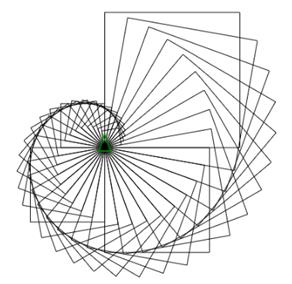
cs make "size 200repeat 36 [ square :size rt 10 make "size :size - 5] |
|
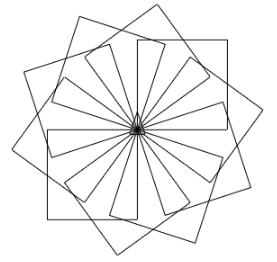
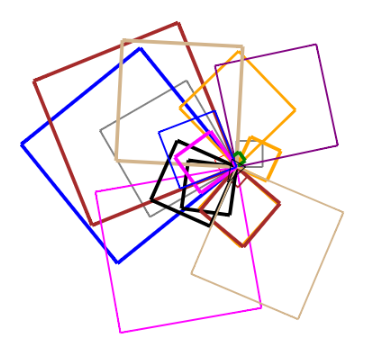
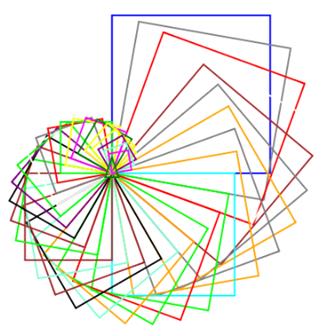
cs make "size 200setpensize 2 repeat 36 [ setpencolor random 16 square :size rt 10 make "size :size - 5] |
|
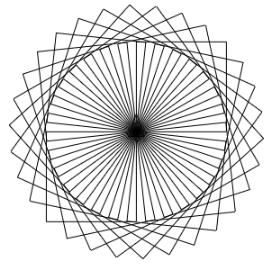
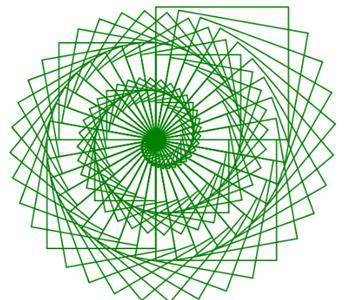
cs make "size 200setpensize 2 setpencolor random 16 while :size > 0 [ square :size rt 10 make "size :size - 2] |
|
to triangle :size repeat 3 [fd :size rt 120]endcs setpensize 2 setpencolor random 16 pu setxy 25 0 pd make "size 200while :size > 0 [ triangle :size rt 10 make "size :size - 20]pu home setxy -25 0 pd lt 60 make "size 200while :size > 0 [ triangle :size lt 10 make "size :size - 20] |
|
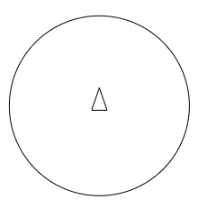
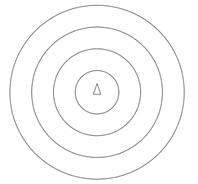
to circle :radius arc 360 :radius endmake "rad 200cs setpensize 2 while :rad > 0 [ setpencolor random 16 circle :rad make "rad :rad - 20](or)to circle :radius if :radius > 3 [ arc 360 :radius ]endmake "rad 200cs setpensize 2 repeat 1000 [ setpencolor random 16 circle :rad make "rad :rad - 20] |
|
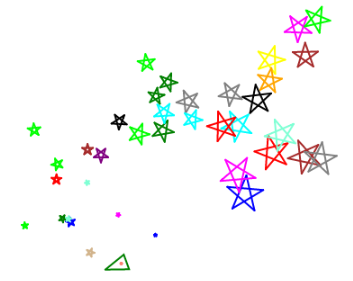
to star :size repeat 5 [fd :size rt 144] ENDcs homemake "size 40while :size > 1 [ pu fd 50 rt random 360 pd setpencolor random 16 star :size make "size :size - 1] |
|
to star make "size random 40 repeat 5 [fd :size rt 144] ENDcs homerepeat 100 [ pu fd 50 rt random 360 pd setpencolor random 16 star] |
|
to star make "size 20 + random 20 repeat 5 [fd :size rt 144] ENDcs homewindowrepeat 100 [ pu fd 50 + random 50 rt random 360 pd setpencolor random 16 star] |
|
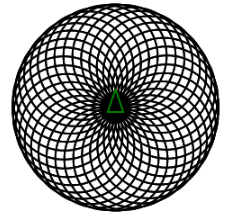
Utilize the following procedures to draw these images and more...to circle :dist repeat 360 [fd :dist rt 1]endTO circles :count :dist repeat :count [ circle :dist rt 360 / :count ]endpd setpensize 2 ... |


12. Write your own procedures and use them in interesting ways!
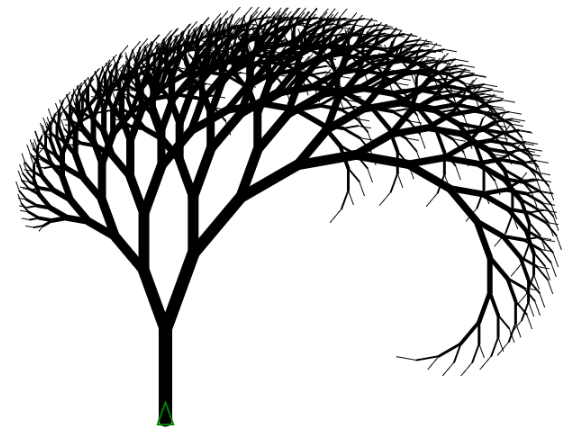
13. Recursion Click on Examples in http://www.calormen.com/logo/# and see last 2: fern & tree
to drawPattern :level if :level > 0 [ make "level :level - 1 fd 50 lt 60 drawPattern :level rt 120 drawPattern :level lt 60 bk 50 ]endcs windowsetpensize 2 drawPattern 3 Change the argument for drawPattern to higher values and see the action! “window” command ensures that the drawing does not wrap around and appear near the opposite edge. |
|||||||||||
to drawPattern :level if :level > 0 [ make "level :level - 1 fd 50 lt 60 if :level > random 10 [ drawPattern :level ] rt 120 if :level > random 10 [ drawPattern :level ] lt 60 bk 50 ]endcs windowsetpensize 2 drawPattern 10 Draws a random pattern every time you run! How? |
|||||||||||
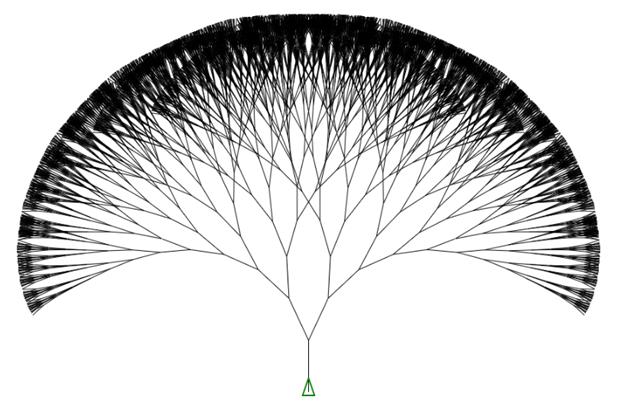
to tree :level :size if :level > 0 [ fd :size lt 10 tree :level - 1 :size * 0.8 rt 10 rt 30 tree :level - 1 :size * 0.8 lt 30 pu bk :size pd ]endcs windowpu setxy 0 -200 pd setpensize 1 tree 13 100 |
|||||||||||
to tree :level :size if :level > 0 [ fd :size lt 20 tree :level - 2 :size * 0.7 rt 20 rt 20 tree :level - 1 :size * 0.9 lt 20 pu bk :size pd ]endcs pu setxy -100 -200 pd setpensize 1 tree 20 100 |
|||||||||||
to tree :level :size if :level > 0 [ setpensize :level fd :size lt 20 tree :level - 2 :size * 0.7 rt 20 rt 20 tree :level - 1 :size * 0.9 lt 20 pu bk :size pd ]endcs pu setxy -100 -225 pd setpensize 1 tree 15 100 |
|||||||||||
|
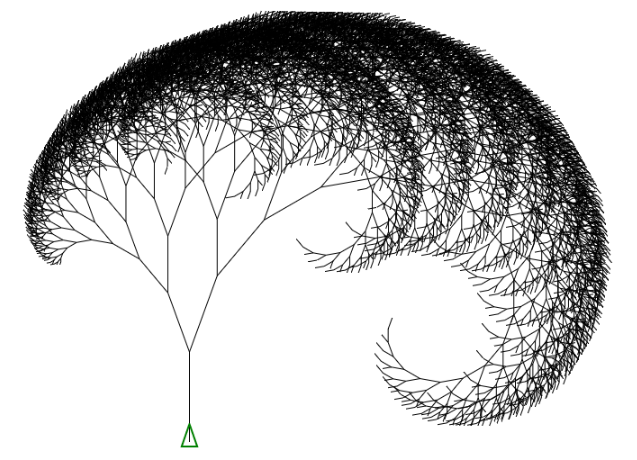
make "angle1 15 make "angle2 30 make "factor1 0.9 make "factor2 0.8 to tree :level :size if :level > 0 [ setpensize 1 + :level / 3 if :level < 3
[ setpencolor 10 ] if :level >=
3 [ setpencolor 0 ] fd :size lt :angle1 tree :level - 1
:size * :factor1 rt :angle1 rt :angle2 tree :level - 1
:size * :factor2 lt :angle2 pu bk :size pd ] end cs window pu setxy 0 -200 pd tree 13 70 Make
changes to angle1, angle2, factor1 and factor2 to make your own wonderful
tree! |
|||||||||||
make "maxlevel 13to tree :level :size :turn if :level > 0 [ fd :size lt :turn tree :level - 1 :size * 0.9 :turn - 3 rt :turn rt :turn tree :level - 1 :size * 0.9 :turn - 3 lt :turn pu bk :size pd ]endcs windowpu setxy 0 -250 pd setpensize 1 tree :maxlevel 75 25 |
|||||||||||
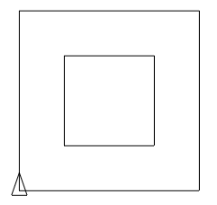
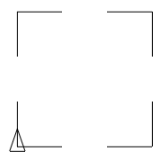
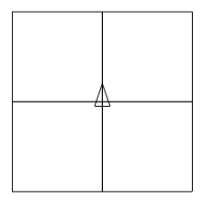
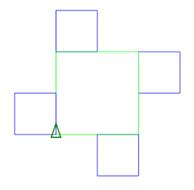
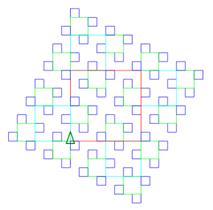
TO recSquare :level :size if :level < 1 [ stop ] repeat 4 [ setpencolor :level fd :size recSquare :level - 1 :size / 2 rt 90 ]endcs recSquare 2 150 Play with different levels! Also, how will you change the colors & fix the tilt. |
|
||||||||||
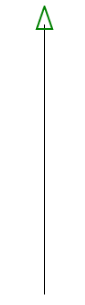
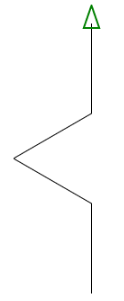
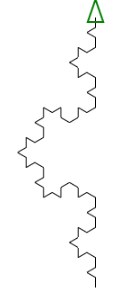
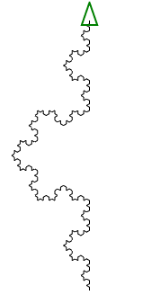
Koch Curveto kochCurve :level :size if :level < 1 [ fd :size stop ] kochCurve :level - 1 :size / 3 lt 60 kochCurve :level - 1 :size / 3 rt 120 kochCurve :level - 1 :size / 3 lt 60 kochCurve :level - 1 :size / 3endcs kochCurve 4 300 Play with different levels (instead of 4) to understand what is going on. |
|
||||||||||
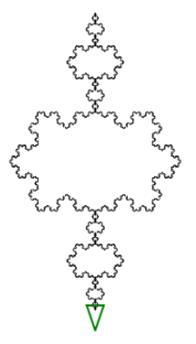
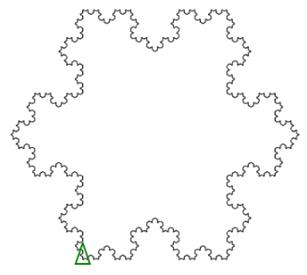
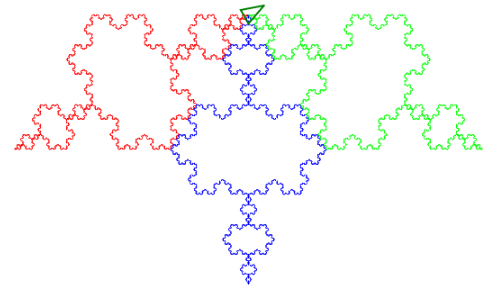
Now let your creativity run wild and build various drawings using Koch Curve as a building block. |


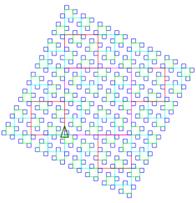


14. A few more interesting drawings ... Feel free to put a personal touch! 
15. More built-in functions... Now that you have played with lots of examples, click on References in http://www.calormen.com/logo/ and select an interesting one to come up with a cool drawing on your own!